VPS手动编译安装配置LAMP(apache+mysql+php)
分类:运维技术日期:2012-01-18 - 19:53:18作者:老谢

老谢博客终于准备搬到vps了,买了vps以后,总要配置环境才能跑wp吧?本文就以tarball手动编译安装的方式来介绍lamp环境的安装配置,如果觉得麻烦,可以考虑安装图形化面板或者一键包,不过这样的话,似乎木有折腾的成就感了 Orz..
在阅读本文前,建议阅读VPS环境配置预备篇
一、编译安装前的操作
清理系统以及设置时区
rpm -qa|grep httpd rpm -e httpd rpm -qa|grep mysql rpm -e mysql rpm -qa|grep php rpm -e php yum -y remove httpd yum -y remove php yum -y remove mysql-server mysql yum -y remove php-mysql #设置操作系统时区 rm -rf /etc/localtime cp /usr/share/zoneinfo/Asia/Shanghai /etc/localtime |
关闭selinux
#关闭selinux /usr/sbin/setenforce 0 #查看selinux状态 /usr/sbin/sestatus #加入开机启动 echo "/usr/sbin/setenforce 0" >> /etc/rc.local |
在编译安装之前,必须保证像gcc,make这样的包已经安装好了,如果你不清楚,建议执行下面命令
yum -y install gcc gcc-c++ bison patch unzip mlocate flex wget automake autoconf cpp gettext readline-devel libjpeg libjpeg-devel libpng libpng-devel libpng10 libpng10-devel gd gd-devel freetype freetype-devel libxml2 libxml2-devel libmcrypt libmcrypt-devel zlib zlib-devel libmhash libmhash-devel glibc glibc-devel glib2 glib2-devel bzip2 bzip2-devel ncurses ncurses-devel curl curl-devel e2fsprogs e2fsprogs-devel libidn libidn-devel openldap openldap-devel openldap-clients openldap-servers nss_ldap expat-devel libtool libtool-ltdl-devel
获取apache、mysql、php
cd mkdir lamp cd lamp wget http://vps.xj123.info/usr/lamp/httpd-2.2.21.tar.gz wget http://vps.xj123.info/usr/lamp/mysql-5.1.59.tar.gz wget http://vps.xj123.info/usr/lamp/php-5.3.8.tar.gz tar -zvxf httpd-2.2.21.tar.gz tar -zvxf mysql-5.1.59.tar.gz tar -zvxf php-5.3.8.tar.gz |
当你阅读本文的时候,可能以上提供的下载版本已经不是最新版本了,你可以去官网自行下载
APACHE:http://httpd.apache.org
MYSQL:http://www.mysql.com
PHP:http://www.php.net
MYSQL第三方:http://download.chinaunix.net/download/0008000/7159.shtml
(其中Mysql请下载Source Code,选最后一个Compressed TAR archive)
二、编译安装MYSQL
编译MYSQL
cd mysql-5.1.59 #増加专门用于管理mysql的用户 groupadd mysql useradd -r -g mysql mysql #生成makefile文件 ./configure --prefix=/usr/local/mysql --localstatedir=/usr/local/mysql/data \ --enable-thread-safe-client --enable-assembler --enable-local-infile \ --with-charset=utf8 --with-collation=utf8_general_ci \ --with-extra-charsets=all --with-big-tables --with-readline --with-ssl \ --with-embedded-server make && make install cd /usr/local/mysql chown -R mysql . chgrp -R mysql . bin/mysql_install_db --user=mysql ln -s /usr/local/mysql/bin/mysql /usr/bin cd ~/lamp/mysql-5.1.59 cp support-files/my-medium.cnf /etc/my.cnf cp support-files/mysql.server /etc/init.d/mysqld chmod 0755 /etc/init.d/mysqld ln -s /usr/local/mysql/lib/mysql /usr/lib/mysql ln -s /usr/local/mysql/lib/mysql /usr/bin/mysql ln -s /usr/local/mysql/bin/mysqldump /usr/bin/mysqldump ln -s /usr/local/mysql/bin/myisamchk /usr/bin/myisamchk ln -s /usr/local/mysql/include/mysql /usr/include/mysql #开机启动 chkconfig --add mysqld #启动mysql服务 service mysqld start |
如果启动mysql,提示Starting MySQL. ERROR! Manager of pid-file quit without updating file.,请检查/usr/local/mysql目录的用户组,是否为mysql
老谢在bin/mysql_install_db –user=mysql的时候,遇到了120118 17:26:42 [Warning] ‘–skip-locking’ is deprecated and will be removed in a future release. Please use ‘–skip-external-locking’ instead.的错误,用vi编辑/etc/my.cng,把skip-locking注释掉即可
配置MYSQL
#配置root密码(MYSQL数据库的ROOT用户) /usr/local/mysql/bin/mysqladmin -u root password "new-password" mysql -u root -p mysql > use mysql; mysql > delete from user where password=""; mysql > exit; mysql>drop database test; mysql>flush privileges; mysql>quit; |
三、编译安装Apache
编译Apache
cd ~/lamp/httpd-2.2.21 ./configure --prefix=/usr/local/apache --enable-so --enable-cache \ --enable-disk-cache --enable-file-cache --enable-mem-cache \ --enable-deflate --enable-headers --enable-mime-magic \ --enable-proxy --enable-rewrite --enable-ssl \ --enable-mods-shared=all --enable-expires make && make install |
–enable-so:就是使用so模块啦。
–enable-deflate:这个就是gzip。
–enable-expires:使用这个可以让一些例如图片文件在浏览者的本地缓存一段时间。
配置Apache
编译安装完成以后,修改httpd.conf文件
vi /usr/local/apache/conf/httpd.conf |
找到User和Gruop,把daemon改成www
vi /usr/local/apache/bin/apachectl |
添加以下代码
# chkconfig:345 85 15
# description:httpd
groupadd www useradd -M -g www -s /sbin/nologin www cp /usr/local/apache/bin/apachectl /etc/init.d/httpd #开机启动 chkconfig --add httpd chkconfig --level 345 httpd on #启动服务 service httpd start |
apache根目录地址:/usr/local/apache/htdocs
四、编译安装PHP
编译PHP
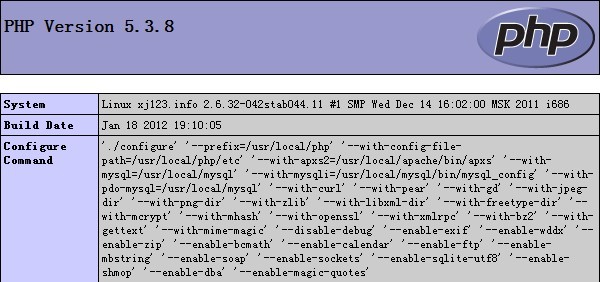
cd ~/lamp/php-5.3.8 ./configure \ --prefix=/usr/local/php \ --with-config-file-path=/usr/local/php/etc \ --with-apxs2=/usr/local/apache/bin/apxs \ --with-mysql=/usr/local/mysql \ --with-mysqli=/usr/local/mysql/bin/mysql_config \ --with-pdo-mysql=/usr/local/mysql \ --with-curl \ --with-pear \ --with-gd \ --with-jpeg-dir \ --with-png-dir \ --with-zlib \ --with-libxml-dir \ --with-freetype-dir \ --with-mcrypt \ --with-mhash \ --with-openssl \ --with-xmlrpc \ --with-bz2 \ --with-gettext \ --with-mime-magic \ --disable-debug \ --enable-exif \ --enable-wddx \ --enable-zip \ --enable-bcmath \ --enable-calendar \ --enable-ftp \ --enable-mbstring \ --enable-soap \ --enable-sockets \ --enable-sqlite-utf8 \ --enable-shmop \ --enable-dba \ --enable-magic-quotes make && make install |
让Apache支持PHP
vi /usr/local/apache/conf/httpd.conf |
添加以下内容
添加默认索引页
编辑httpd.conf,找到以下内容
<IfModule dir_module>
    DirectoryIndex index.html
</IfModule> |
修改成以下内容后,保存
<IfModule dir_module>
    DirectoryIndex index.html index.php
</IfModule> |
别忘记修改ServerAdmin you@example.com为你自己的邮箱
cd ~/lamp/php-5.3.8 cp php.ini-production /usr/local/php/etc/php.ini ln -s /usr/local/php/bin/php /usr/bin |
vi /usr/local/php/etc/php.ini |
找到short_open_tag = Off编辑为short_open_tag = On
重启apache,如果提示module php5_module is already loaded, skipping,那么编辑httpd.cong,注释掉下面一行
#LoadModule php5_module /usr/local/apache2/modules/libphp5.so
装完测试
[root@xj123 htdocs]# php -v PHP 5.3.8 (cli) (built: Jan 18 2012 19:12:48) Copyright (c) 1997-2011 The PHP Group Zend Engine v2.3.0, Copyright (c) 1998-2011 Zend Technologies |
vim /usr/local/apache/htdocs/info.php |
输入以下内容
<?php phpinfo(); ?> |
访问:http://ip/info.php
五、最后
本文原创+参考,主要参考文档如下:
http://www.junorz.com/archives/20111012338.html VPS(CentOS5.5)上纯手工编译搭建LAMP架构
http://www.mgrei.com/archives/820.html Apache 2.2.x + MySQL 5.5.x + PHP 5.3.x for Linode
http://blog.csdn.net/robertaqi/article/details/6040289 centos 编译安装php,apache,mysql还有搜索论坛的一些帖子,由于URL找不到,所以无法列出来了,非常感谢这些文字的原创作者,为我提供了很大的帮助!
同时也要感谢D大以及FC、战狼等CFan编程委员会(0x7F)QQ群的朋友们给我提供的帮助,折腾了两三天,终于手动把lamp编译配置完了,一个linux小白折腾这些,真是痛苦,Orz…
最最后,要感谢okvps的老大vaman的vps,速度非常好,并且vps性能也很棒,另外一天半重装了9次系统,太折磨vaman老大的母机了!!
这篇帖子编辑了一天,终于完成了,由衷的希望本帖可以为像我一样的菜鸟提供到帮助!!吃饭去鸟,饿死了! Orz..

果断沙发吧
哇,被感谢了~激动!!!
现在webnx真的好火啊,速度不错
好详细的说,要是整理成脚本就更好了~~~
整理成脚本就不好了,这样的教程就是适合亲自diy一遍
我都没这么勤奋过 明天自己给自己开一个操练一遍
坐等脚本出世
@xt. 这个..真不会 Orz..
弄成脚本就更好了哈
有VPS的淫,真幸福。
@。潇 你也值得拥有
我安装的是一键安装包,哎哎。
@返利网 一键包挺方便的
在哪儿买脚本呢
哈哈。。折腾帝。。。
编译apache过程中出现了问题:
[root@xxxxx httpd-2.4.2]# –enable-mods-shared=all –enable-expires
-bash: –enable-mods-shared=all: command not found
[root@xxxxx httpd-2.4.2]# make && make install
make: *** No targets specified and no makefile found. Stop.
本人都是照该教程操作的,怎么无法makeinstall?
@jacks 是用./configure创建makefile的,后面的仅仅是参数
Configuring Apache Portable Runtime library …
checking for APR… no
configure: error: APR not found. Please read the documentation.
配置发现没有APR库,是不是新版本的httpd不带这个的,要自己安装才行?
编译安装完成以后,修改httpd.conf文件
1
vi /usr/local/apache/conf/httpd.conf
找到User和Gruop,把daemon改成www
1
vi /usr/local/apache/bin/apachectl
前面我已经编译好apache了,到这步打开编辑httpd.conf为何是空白的?
刚才检查了一下,原来是我的目录是apache2,这样对下面有影响吗?
@jacks 编译的时候prefix参数就是指定目录的
# chkconfig:345 85 15
# description:httpd
这两个不是注释吗? 有什么用呢
@不语 不添加描述无法使用chkconfig